
By Michael Harper
Swift is the new programming language from Apple announced at WWDC 2014. As of September 9, 2014, you can now submit apps that use Swift to the App Store. In my copious free time, I’ve been getting both my hands dirty and my feet wet with Swift on several projects.
Here I’ll show you how straightforward it is to use ProximityKit for iOS with Swift.
Let’s Get Our Swift On
1- In order to use Swift, you need to install and run Xcode 6 or newer.
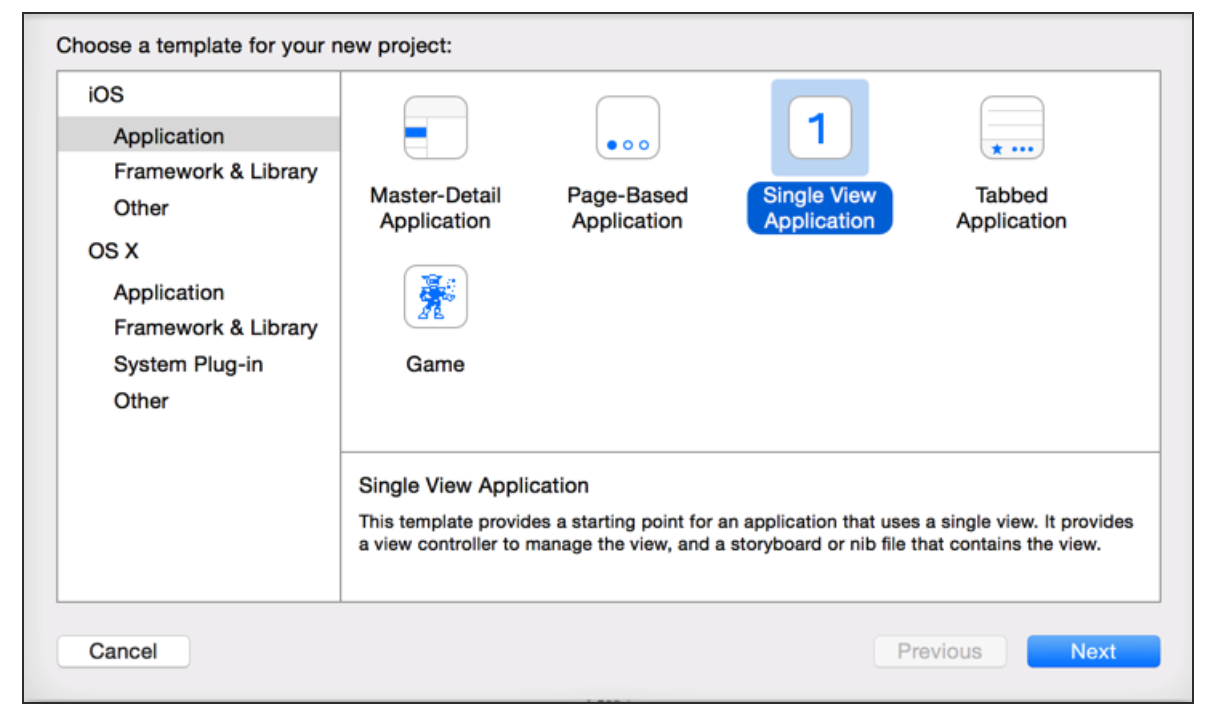
2- Create a new iOS Single View Application project.
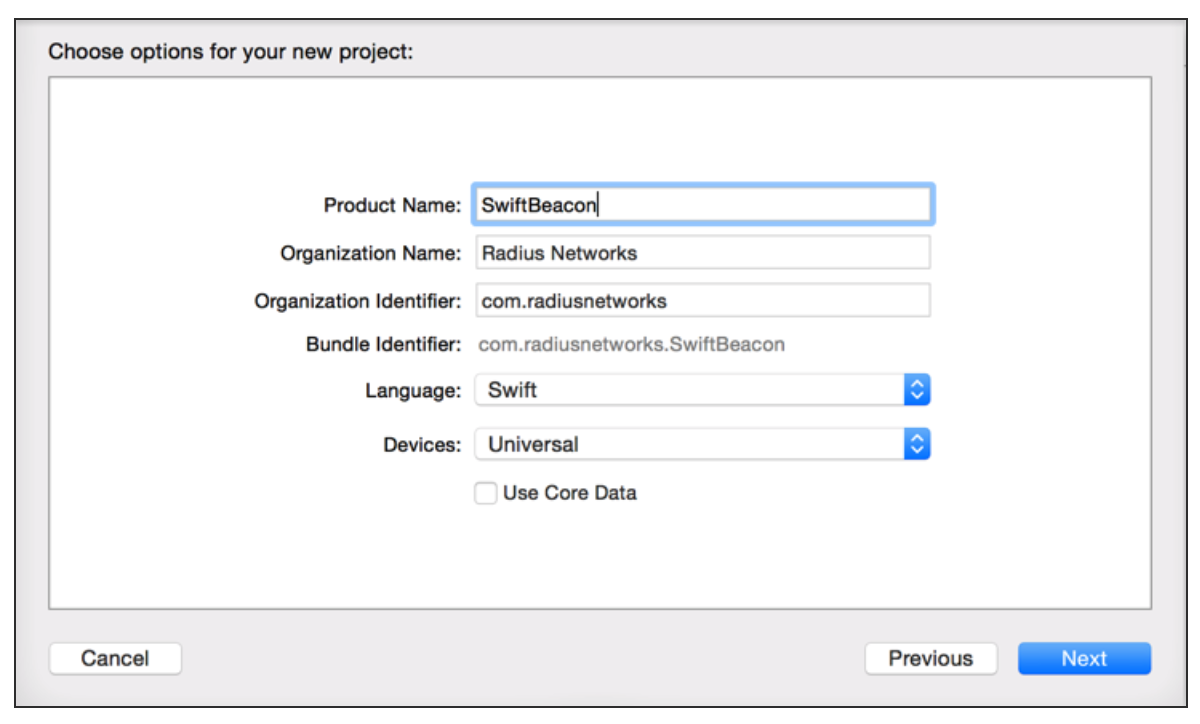
3- We’ll call ours “SwiftBeacon”. Make sure you select “Swift” in the Language menu.
4- Close the project window as we’re going to use CocoaPods to include ProximityKit in the app.
5- Initialize your project to use CocoaPods by running this command in the root directory of your project:
$ pod init
6- This creates a Podfile in the root directory of your project. For the purposes of this example, I removed the target-specific pod settings. In order to use the ProximityKit, your Podfile should contain the following
source 'https://github.com/CocoaPods/Specs.git'
pod 'ProximityKit', '~> 1.0'
7- Then run
$ pod install
8- Now open the .xcworkspace file for your project going forward so that the ProximityKit CocoaPod is automatically included.
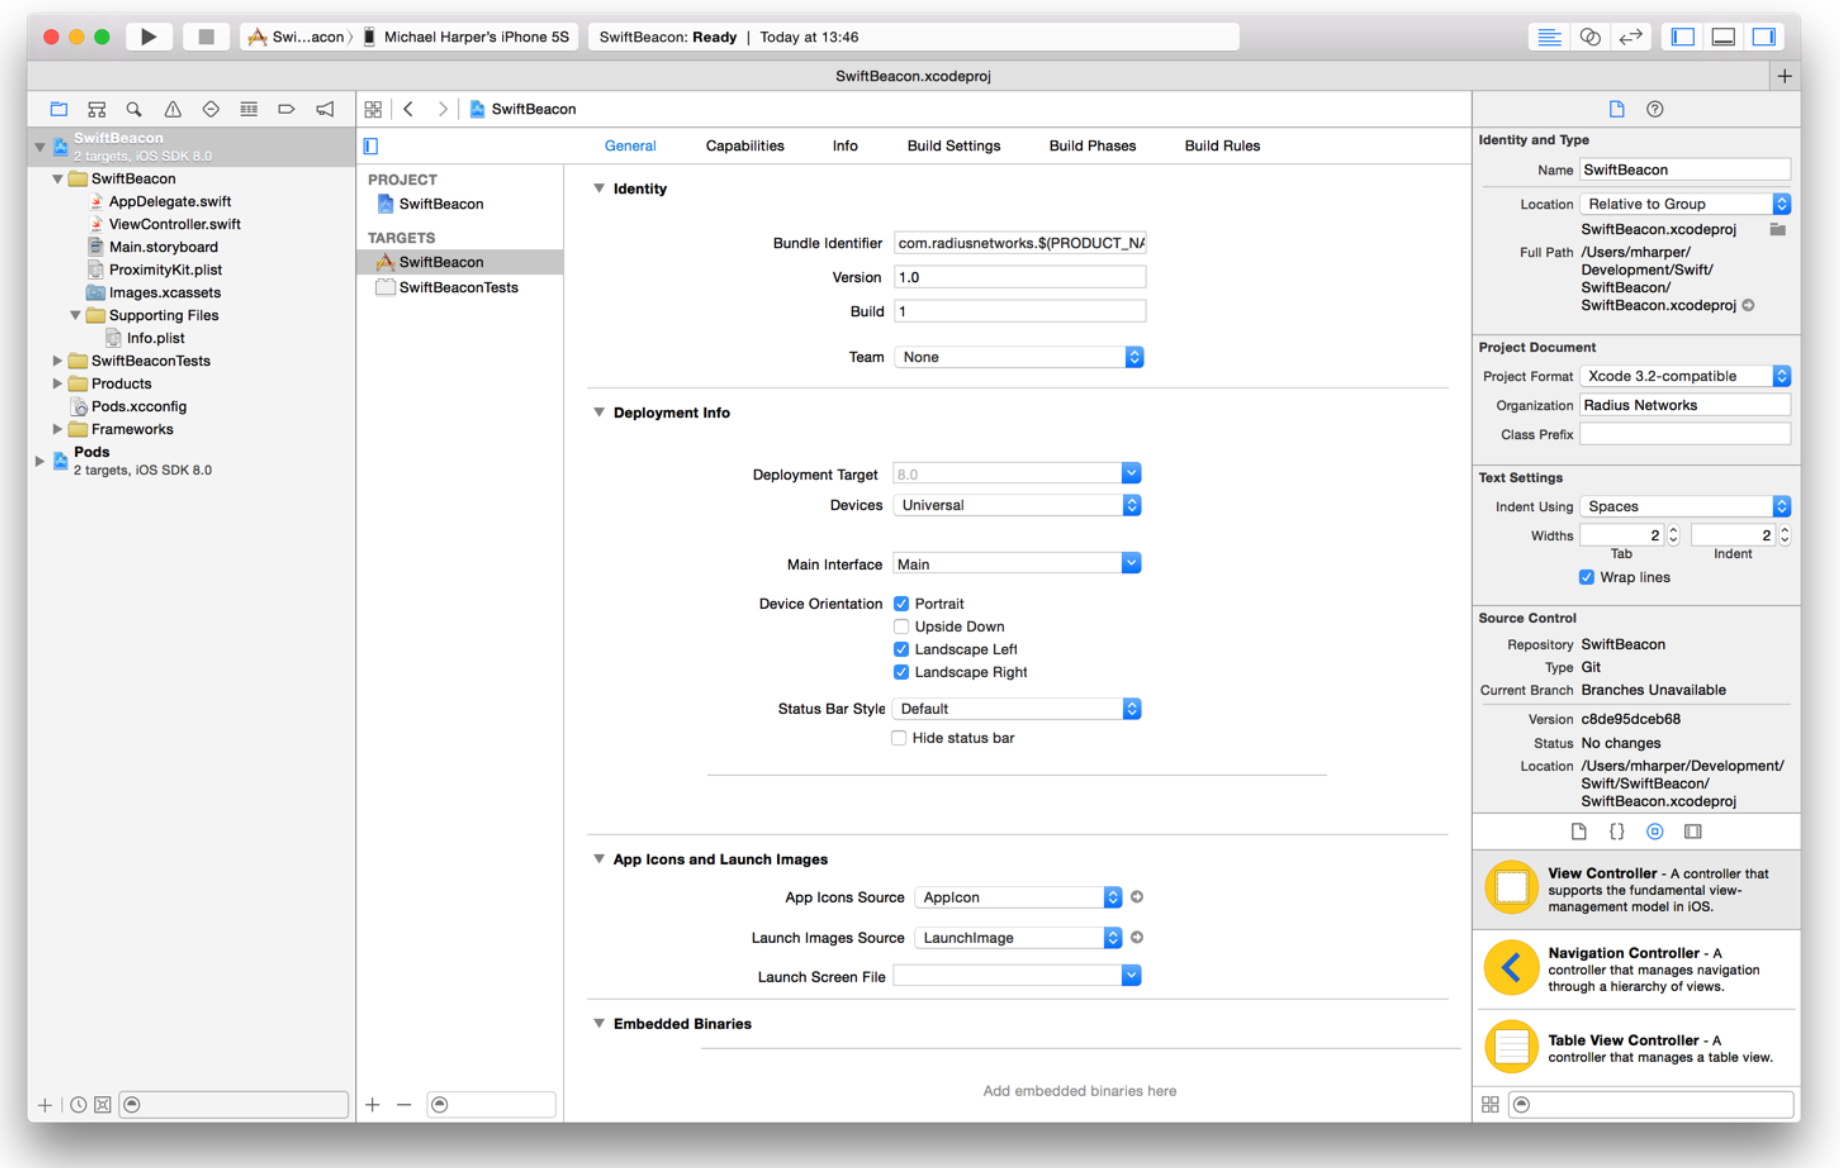
9- Download the ProximityKit configuration file for your kit and copy it into your Xcode project. My project now looks like this:
At this point, you should be able to build and run this app on your phone. It’d be a good idea to do this right now, just to be sure you’ve done everything properly up to this point. On my phone, the app simply displays a white screen.
Bridging Swift and Objective-C
We now have a project containing some Swift code and the ProximityKit framework. But the app is written in Swift and ProximityKit is written in Objective-C! How will we bridge that gap?
Of course, Apple thought about this and provides us with a solution called a “bridging header.”
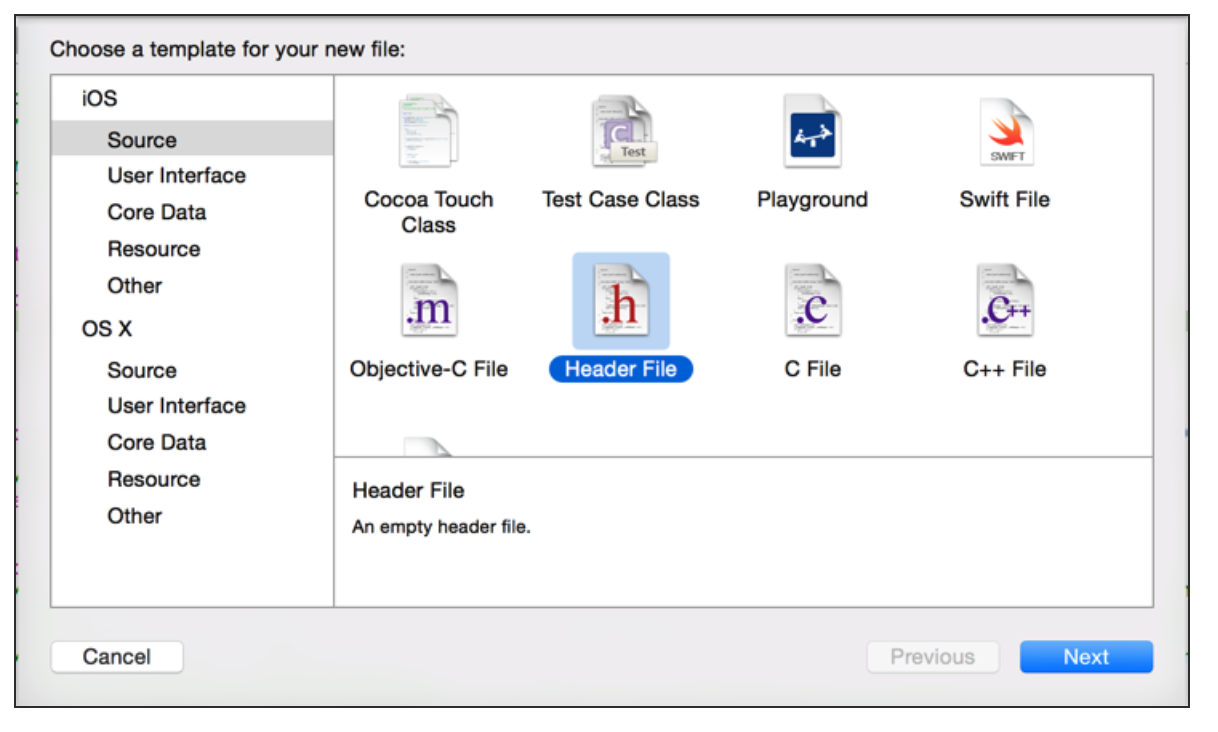
1- Create a new header file named <project_name>-Bridging-Header.h. In our case, we’re calling it SwiftBeacon-Bridging-Header.h. You need not add this to any target since it’s a simple header file.
2- #import the ProximityKit header file in the bridging header file.
#import <ProximityKit/ProximityKit.h>
You can include any other header files here for Objective-C items you need to access from your Swift code.
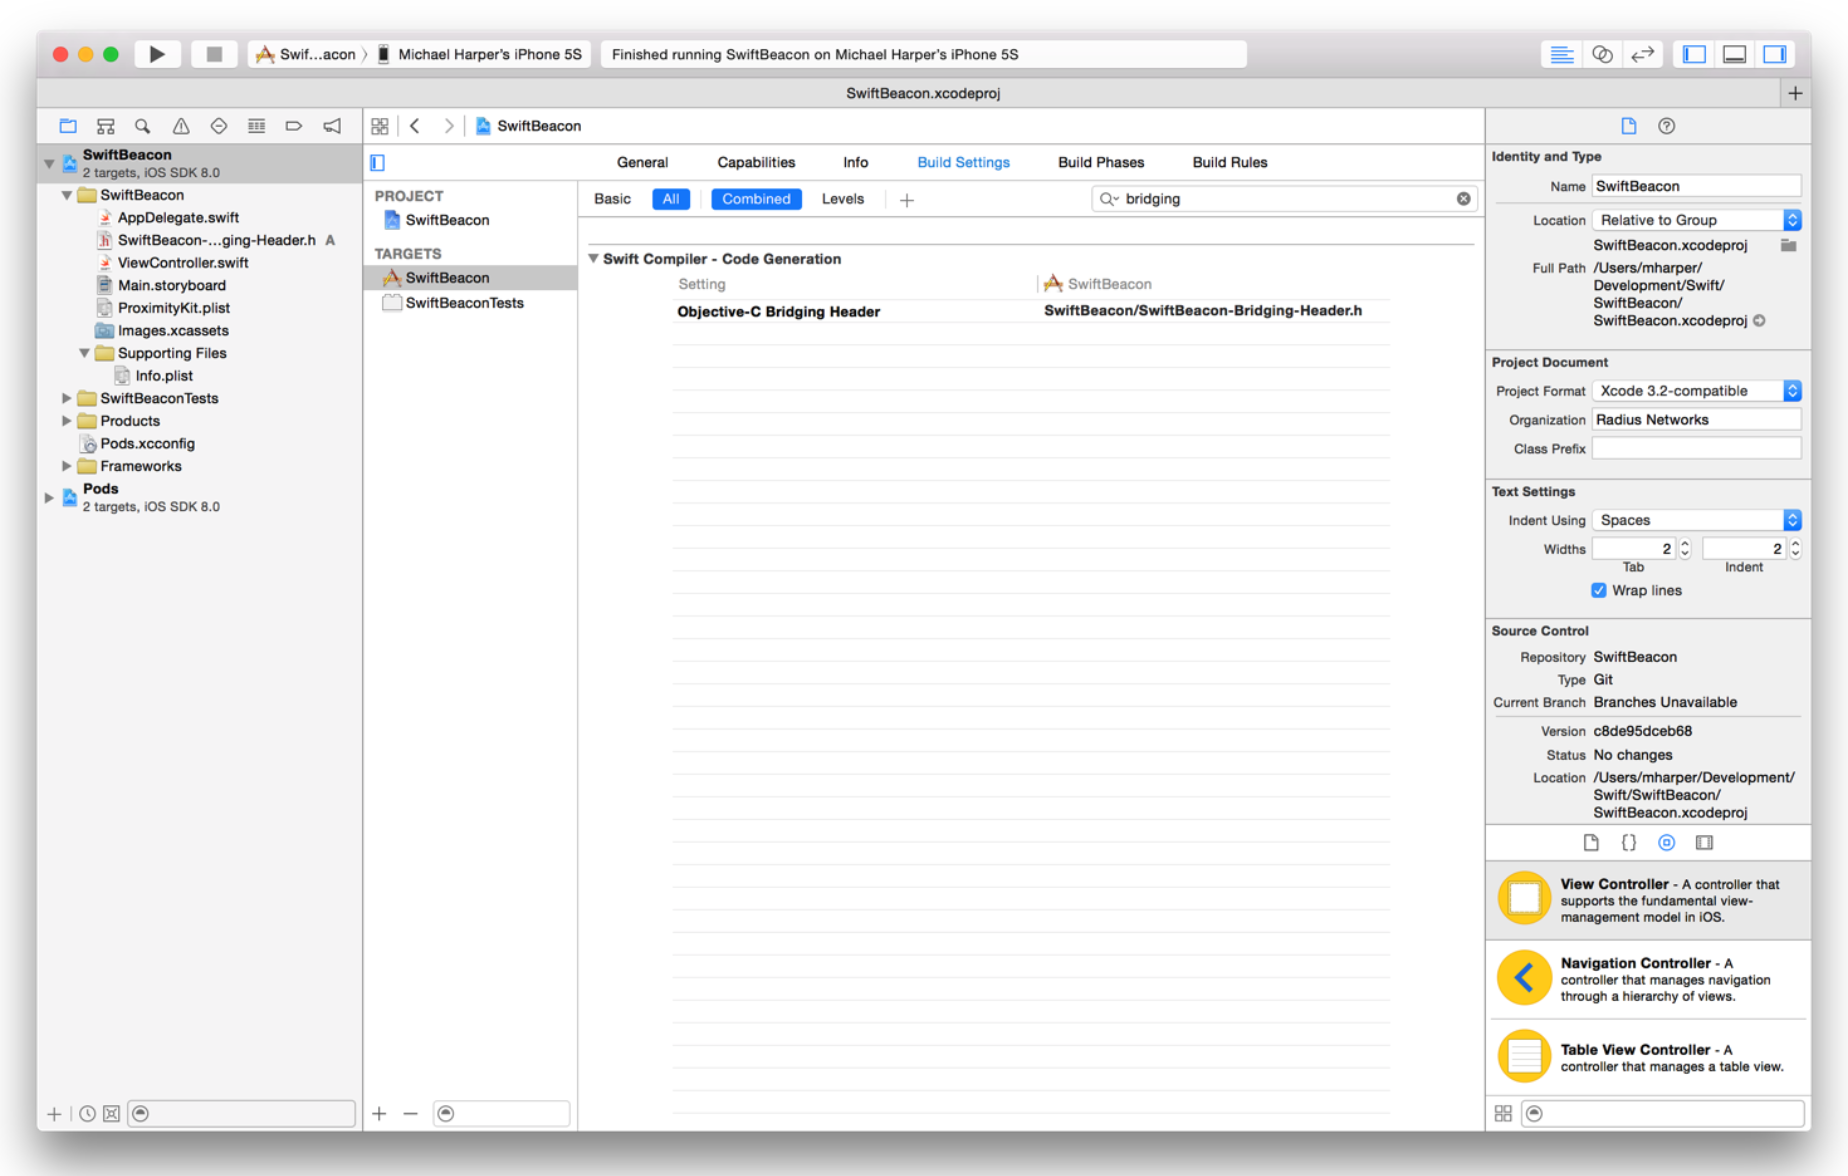
3- Set the bridging header file in the build settings for the app target. Do this by selecting the target, then build settings, and search for “bridging”. Set the value for the Objective-C Bridging Header to the name of the bridging header file you just created. I found I had to precede it with the path to the file relative to the root directory of the project, e. g. SwiftBeacon/SwiftBeacon-Bridging-Header.h
Once again, build and run your app to make sure you’ve setup your bridging header file properly.
Connect Swift Code to ProximityKit
All of the puzzle pieces are now in place so that we can hook up the app to ProximityKit.
-
Start by implementing the
RPKManagerDelegateprotocol in your AppDelegate@UIApplicationMain class AppDelegate: UIResponder, UIApplicationDelegate, RPKManagerDelegate ... -
Add a
RPKManagerto your AppDelegatevar proximityKitManager: RPKManager? -
Initialize and start
proximityKitManagerinapplication()method of your AppDelegateself.proximityKitManager = RPKManager(delegate: self) self.proximityKitManager!.start() -
Implement the
RPKManagerDelegatemethods as necessary.func proximityKitDidSync(manager : RPKManager) { NSLog("didSync") } func proximityKit(manager: RPKManager!, didDetermineState state: RPKRegionState, forRegion region: RPKRegion!) { NSLog("didDetermineState \(state) for region \(region)") } func proximityKit(manager : RPKManager, didEnter region:RPKRegion) { NSLog("didEnter region %@", region) } func proximityKit(manager : RPKManager, didExit region:RPKRegion) { NSLog("didExit region %@", region) } func proximityKit(manager : RPKManager, didRangeBeacons beacons:NSArray, inRegion region:RPKRegion) { NSLog("didRangeBeacons %@", beacons) } -
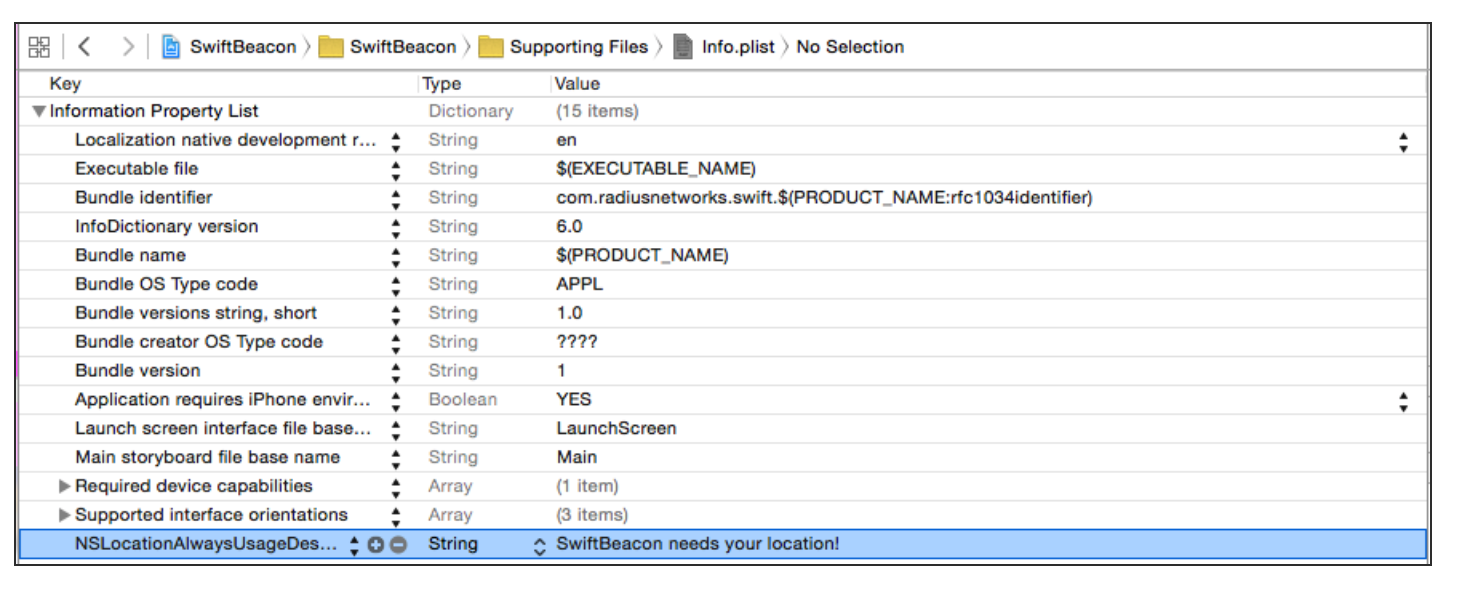
CoreLocation in iOS 8 now requires that you request authorization from the user to monitor the device location. In order to do so, you must specify a new key/value pair in your app’s
Info.plistfile for the keyNSLocationAlwaysUsageDescription. The value for this key is the message that will be displayed when iOS asks the user to authorize location monitoring. Here’s what mine looks like (highlighted):
Build and run once again. ProximityKit automatically requests authorization for location monitoring on the behalf of your app but only if the key in your Info.plist file is properly setup. Assuming you are in the vicinity of beacon(s) that are in your kit, you should see log messages in your debug console indicating what’s going on with ProximityKit.
Swift Resources
GitHub repository for this example.
The Swift Programming Language book from Apple.
There are several excellent Swift-related sessions from WWDC 2014. (You must be a registered Apple developer to access these videos.)
Swift forum at devforums.apple.com. (You must be a registered Apple developer to access these forums.)
